
In this newsletter, we will outline the SAP Space approach and dive deeply into how to create and allocate space. Let’s start by exploring the capabilities of the SAP Datasphere Space.
What is “Space”?
In SAP Datasphere, all activities involving data acquisition, preparation, and modelling are conducted within designated “spaces.” These spaces are secure zones, with data remaining inaccessible outside of them unless it is intentionally shared or made available for use elsewhere.
Administrators are tasked with creating these spaces. They assign disk and memory resources, establish priorities, and can set limits on the amount of memory and number of threads that the space’s processes can utilize.
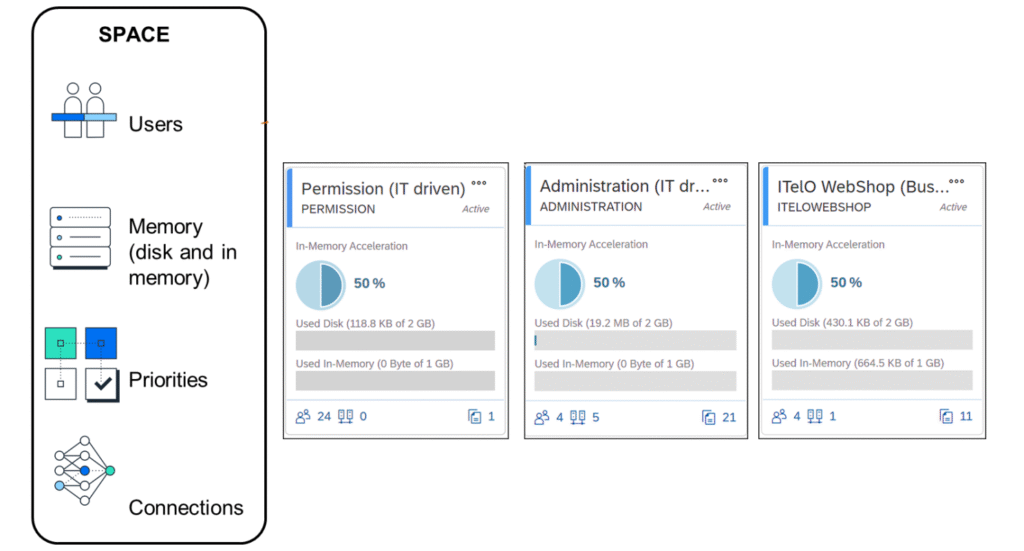
Spaces are virtual work environments with their own databases. They are separate but allow flexible access so users can work together without worrying about sharing their data. To work with your data and create stories, you need to start with a space. You can choose the amount and type of storage you need and how important your space is compared to others. You can also add members and set up connections in the space. If you have data you want to access through SAP Datasphere or want to use data from SAP Datasphere in other tools or apps, you can set up an open SQL schema or a space schema.
Create and Manage a Space
The steps below should be followed to create a space.
- Click the Space Management icon located at the bottom left, then click the Create button at the top right.
- Provide a name for your Space. The Space ID will be generated automatically.
- Then click on the Create button.
After you create the space, you will be able to see your current spaces on the Space Management screen, each Space is displayed as a tile. These tiles can be coloured red, green, or blue. Green ones present optimal performance, red is overactive and needs more resources, and the last one is blue presents underactive.
Note: Unused resources from a blue Space can be reallocated to a red Space.
On the monitoring screen, you can:
- View the used disk and in-memory storage of your Space.
- Track assigned data flow capacity units.
- Filter by schema or storage type and adjust values via a drop-down menu. Results are shown in doughnut and bar charts.
- Note that hidden replica tables of virtual tables in SAP HANA Cloud are stored in the SYSTABLE_REPLICA_DATA schema.
- The table storage consumption graph shows relevant tables based on your filters, providing an overview of storage use. Table details include the name, schema, storage type, record count, and storage used. You can sort or group tables and search for specific values.
After the steps you followed, you can monitor and overview your space settings. Additionally, you can adjust your disk space and memory allocations to suit your needs if desired.
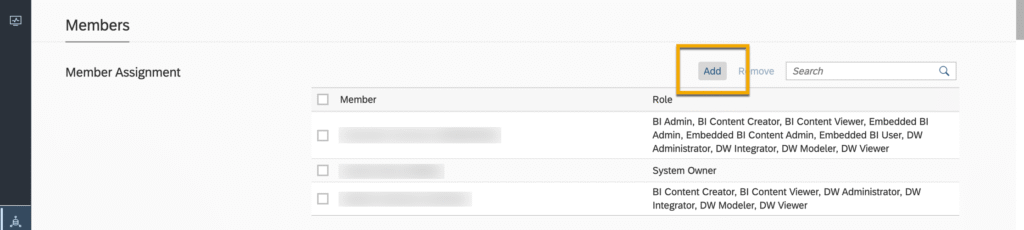
Add Users to the Space
- Once you’re in your Space, click on the Members tab or scroll down to the Members section.
- Click on Add to assign a member from your user list.
- You can now choose the users you want to add to your Space by selecting them. Once you’re satisfied with your selections, click Add to confirm.
Conclusion
In this newsletter, we’ve outlined how to create and manage spaces in SAP Datasphere. Spaces are secure, flexible environments for data work, allowing effective collaboration while protecting data. We covered steps to create spaces, monitor their performance, and adjust resources, including adding users. By leveraging these features, you can efficiently manage your SAP Datasphere setup and optimize it to fit your needs.